To install motion sensor lights correctly, we’ll first shut off power at the circuit breaker and verify with a voltage tester. We’ll need essential tools including screwdrivers, wire cutters, and safety equipment like insulated gloves and goggles. After mounting the bracket 8-10 feet high, we’ll connect ground, neutral, and hot wires using proper wire nuts. Careful setup of detection range and weatherproofing guarantees ideal security coverage. Following our detailed process helps guarantee safe, reliable installation.
Key Takeaways
- Turn off power at the main circuit breaker and verify with a voltage tester before starting any electrical work.
- Mount the sensor light 8-10 feet high in strategic locations like entrances and walkways for optimal coverage.
- Connect ground, neutral, and hot wires correctly using wire nuts, ensuring all connections are secure and properly insulated.
- Adjust sensitivity settings and detection range between 20-70 feet using the test mode to minimize false triggers.
- Weatherproof all connections and apply silicone caulk around mounting plates for outdoor installations to prevent moisture damage.
Essential Tools and Materials Checklist

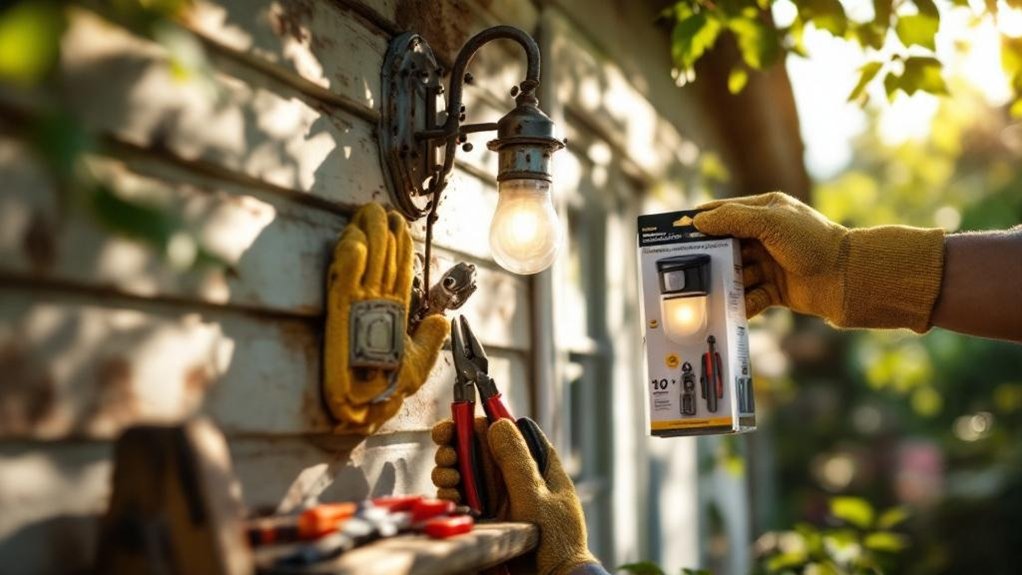
To install motion sensor lights safely and effectively, you’ll need three categories of essential items: basic hand tools, electrical materials, and safety equipment.
Let’s start with installation tips for the necessary tools: gather your screwdrivers, wire cutters, pliers, and a reliable drill with appropriate bits. For electrical materials, you’ll need the motion sensor fixture, mounting hardware, wire connectors, and electrical tape. We always emphasize safety equipment: a sturdy ladder, safety goggles, insulated gloves, and a voltage tester are non-negotiable.
Remember proper tool maintenance – keep your equipment clean, organized, and inspect them before each use. We recommend having terminal blocks and extra wire connectors on hand. Working with electricity requires precision, so having the right tools in good condition is vital for a successful installation. The installation will provide hands-free lighting operation once completed, making it worth the careful preparation.
Safety Precautions Before Installation
Before we begin any electrical work, we’ll need to turn off power at the main circuit breaker and verify the absence of current using a properly rated voltage tester. We’ll gather our essential safety equipment, including insulated gloves, safety glasses, and non-conductive tools to protect against electrical hazards. Once we’ve confirmed zero voltage at our work area, we’ll identify and label all wires while maintaining proper isolation techniques for maximum safety. Mark the main circuit breaker with tape to prevent anyone from accidentally restoring power during installation.
Power Off Before Starting
When working with any electrical installation, your first critical safety step involves completely disconnecting power at the main electrical panel. We’ll need to locate the correct circuit breaker and switch it to the OFF position before proceeding with any installation techniques. Proper installation ensures safety and effectiveness during the setup of motion sensor lights. To guarantee circuit safety, we must verify the power is truly off using a reliable circuit tester or voltage meter. Test both the wires and any existing fixtures where we’ll be working. Remember, we’re all part of keeping our homes safe, so let’s double-check that related wall switches are also turned off. If you’re unsure which circuit controls your work area, it’s best to shut off the main breaker. We never want to risk electrical shock when installing motion sensor lights.
Gather Safety Equipment First
Now that we’ve confirmed our workspace is properly de-energized, we’ll start assembling our complete safety kit. Our essential safety gear includes insulated gloves, safety glasses, and steel-toed boots to protect against potential hazards during installation.
Let’s review our equipment checklist together: we’ll need a reliable voltage tester, insulated tools including wire strippers and screwdrivers, and a sturdy non-slip ladder. Don’t forget to keep a first aid kit nearby – safety always comes first in electrical work. For outdoor installations, we’ll also want weather-resistant materials and proper sealants. Having the right equipment is crucial when installing dual technology sensors for maximum accuracy and reliability.
Test Wiring for Current
Since all electrical work demands rigorous safety protocols, testing for current must be our first hands-on step in the installation process. We’ll start by turning off power at the main electrical panel and securing it to prevent accidental reactivation during our work.
Let’s proceed with proper wire testing using a reliable voltage tester to verify there’s absolutely no current flowing through any wires we’ll be handling. A properly functioning voltage tester helps identify live wires and prevent electrical shock during installation. We’ll carefully identify and label each wire – hot, neutral, and ground – even if their colors seem obvious. Remember, electrical safety is our top priority, so we’ll double-check our readings before touching any wires. If you’re unsure about any readings or encounter unexpected results, it’s best to pause and consult a qualified electrician like our team at Pride Electric.
Choosing the Right Location for Maximum Coverage
When selecting locations for motion sensor lights, we’ll focus on mounting them at the ideal 8-10 foot height to guarantee proper detection range while preventing tampering. We’ll identify high-traffic zones around entrances, walkways, and potential access points to maximize security coverage and minimize dark spots. Strategic corner placement will help us achieve overlapping detection zones, particularly in vulnerable areas like side yards and hidden alcoves. Professional installation ensures optimal positioning and electrical safety compliance with local regulations.
Ideal Mounting Height Placement
Selecting the ideal mounting height for motion sensor lights greatly impacts their effectiveness and reliability. We recommend installing sensors between 8-10 feet high for best coverage and minimal false triggers. This sensor placement provides a detection range of 20-30 feet for adult humans while reducing unwanted activations from pets and wildlife.
For properties with unique features like slopes or shrubbery, height adjustments between 6-8 feet may be necessary to maintain proper coverage. Keep in mind that mounting above 10 feet can compromise detection of close movement, while installing below 6 feet increases false alarms. When mounting your sensor, angle it slightly downward and across pathways rather than head-on. This positioning maximizes detection while minimizing interference from passing vehicles and other unintended triggers. The type of sensor used in your motion light can also affect ideal mounting height, as PIR, ultrasonic, and microwave sensors each have different detection capabilities.
Strategic Corner Coverage Areas
To maximize motion sensor coverage, strategic corner placement requires careful consideration of detection patterns and room geometry. When installing corner sensors, we’ll want to position them to project detection into the space rather than toward walls, achieving ideal detection angles of typically 90 degrees.
We recommend mounting sensors slightly away from corners to prevent blind spots and using adjustable brackets for fine-tuning post-installation. For corner sensor efficiency, avoid placement near HVAC vents or heat sources that could trigger false detections. In larger spaces, we’ll often combine corner sensors with ceiling or wall units to eliminate dead zones. Rare earth magnets provide flexible positioning options when standard mounting isn’t practical.
Testing is essential – we’ll verify coverage by walking through the intended detection paths and adjusting sensor angles until we achieve thorough protection of the target area.
Identifying High-Traffic Zones
Strategic placement of motion sensor lights begins with identifying your property’s highest-traffic areas that require consistent illumination. We’ll focus on key zones that experience frequent movement throughout evening hours.
Let’s prioritize walkways, entryways, and outdoor stairs where family members and guests commonly travel. These high traffic areas need reliable outdoor lighting to prevent trips and falls while deterring potential intruders. Installing advanced motion sensors that detect body heat will significantly reduce false alarms from wind-blown objects. Pay special attention to your driveway approach and garage entrance, as these zones serve both vehicles and pedestrians. Don’t overlook recreational spaces like outdoor kitchens or pergolas where evening activities often occur.
For maximum effectiveness, we recommend installing motion sensors with overlapping coverage patterns across these zones, ensuring no critical areas remain dark. This thorough approach enhances both safety and security while maintaining energy efficiency.
Turning Off Power and Checking Electrical Connections
Safety is paramount when installing motion sensor lights, and proper power disconnection is your first critical step. We’ll start by locating your circuit breaker panel and turning off power to the lighting circuit. Before touching any wires, let’s verify power disconnection using a voltage tester.
Once we’ve confirmed the power is off, we’ll identify and label each wire in your existing setup. The black wire carries power, white is neutral, and green or bare copper serves as ground. We’ll use wire nuts to make secure connections, matching colors appropriately. Remember to cap off any unused wires for safety. Having the right installation tools ready will ensure you can complete the project efficiently and safely.
For added protection, we recommend posting a notice near your circuit breaker to prevent accidental power restoration during installation. If you’re unsure about any connections, don’t hesitate to contact a licensed electrician.
Removing Old Light Fixtures Safely
Proper removal of the existing light fixture begins with several critical safety precautions. First, we’ll confirm all power is off using a voltage tester, and we’ll gather our essential tools, including screwdrivers, wire cutters, and safety goggles. Let’s assess the fixture type – whether it’s flush-mount, pendant, or chandelier – as removal techniques vary accordingly.
Expect to spend around $550 for professionals if the task proves too complex for DIY removal. We’ll start by removing bulbs and any glass covers or globes, being careful to avoid breakage. Next, we’ll support the fixture’s weight while disconnecting the mounting hardware and electrical connections. After separating wires, we’ll cap them with wire nuts for safety. Remember to keep all hardware organized, as some components may be reusable. Let’s dispose of the old fixture properly and guarantee our work area is clean before proceeding with the new installation.
Installing the Mounting Bracket and Base
We’ll start by securing the mounting location, ensuring the electrical box is properly anchored and the surrounding wall surface is stable and clear of debris. Before assembling the bracket, we’ll verify that the wall’s structural integrity meets local building codes and can support the weight of the motion sensor light fixture. Now we’re ready to attach the mounting bracket to the electrical box using manufacturer-supplied screws, making sure it’s perfectly level and tight against the surface.
Securing Mounting Location First
Before connecting any wires, you’ll need to secure a stable mounting location for your motion sensor light. We’ll help you select a sturdy surface that can properly support your fixture’s weight while guaranteeing ideal sensor coverage for your security needs.
First, we’ll verify the mounting surface can accommodate a recessed electrical box, as this provides the necessary stability and code compliance. Let’s position the mounting bracket flush against the junction box, making sure it’s level and properly oriented for the sensor’s detection range. We’ll use appropriate hardware to fasten the bracket securely, being careful not to over-tighten the screws. For outdoor installations, we’ll need to take into account environmental exposure and guarantee the mounting location allows for proper weatherproofing of all connections.
Wall Preparation Requirements
To guarantee a secure installation of your motion sensor light, thorough wall preparation must begin with cleaning the mounting surface and inspecting the electrical box compatibility. We’ll want to remove all dust, dirt, and loose material to make sure the best bracket alignment and adhesion.
Let’s carefully check that your electrical box is properly anchored and rated for your installation location. We’ll verify the box depth accommodates wiring needs and confirm it’s weatherproof for outdoor applications. Having proper wire connections is critical for reliable motion detection performance. After marking screw holes with precision, we’ll drill using appropriate bits and insert wall anchors rated for your light’s weight. Remember to apply weatherproof sealant around the mounting edges to prevent moisture infiltration. Always wear safety goggles when drilling, and make sure all mounting hardware is rust-resistant for lasting durability.
Bracket Assembly Steps
Installing your motion sensor light’s mounting bracket requires three key components – a secure bracket, proper wiring connections, and a stable base. Let’s guarantee we’re working safely by first turning off power at the circuit breaker.
Different bracket types require specific mounting approaches, so we’ll follow the manufacturer’s guidelines carefully. Start by attaching the mounting bracket to your junction box, applying even torque to keep it level. Connect the wiring using wire nuts – black to black, white to white – and secure the ground wire. Once the connections are protected, attach the mounting plate to the bracket, ensuring proper alignment markers are followed. Always use a voltage tester before handling any wires. Finally, secure the base to the mounting bracket, verify it’s level, and test for stability before restoring power and adjusting the sensor settings.
Connecting and Securing the Wiring
Proper wiring connections form the foundation of a safe and reliable motion sensor light installation. Let’s make sure we’re following the correct wire connection techniques by first identifying and connecting each wire. We’ll connect the ground wire (bare copper or green) to the ground terminal, the neutral wire (white) to the neutral terminal, and the hot wire (black) to the power source. Then, we’ll connect the red load wire to the light fixture. Turn off power at the main circuit breaker before starting any electrical work.
Using yellow nut caps, we’ll secure all connections and carefully tuck the wires into the wall box. For ideal sensor adjustment tips, remember to test all connections with a voltage meter before restoring power. We’ll also verify that all connections meet local building codes and wrap them with electrical tape for added protection.
Setting Up Motion Detection Range
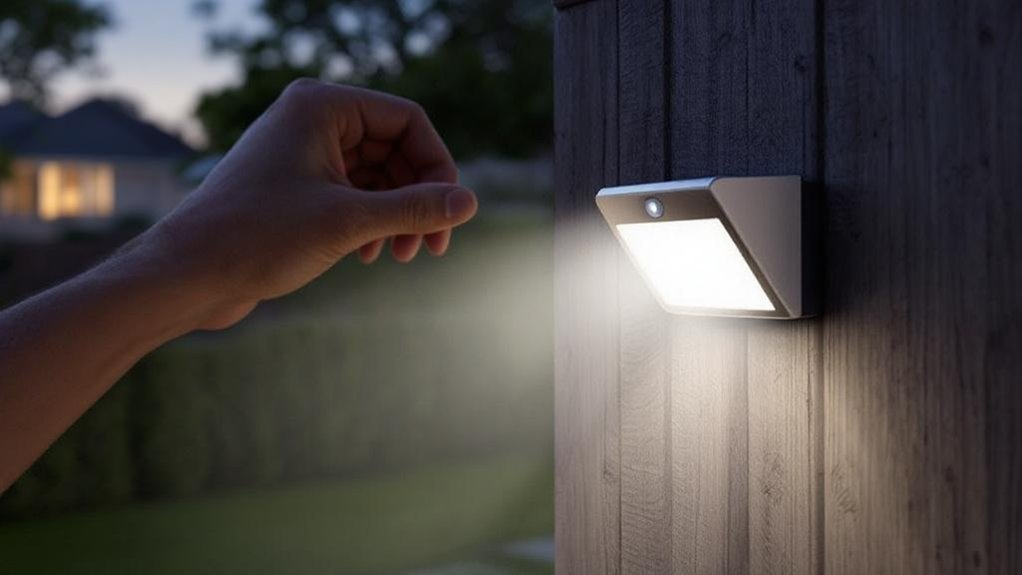
Now that our wiring connections are secure, we’ll focus on enhancing the motion sensor’s detection range. We’ll mount the sensor at the ideal height of 6 to 10 feet for maximum coverage. Let’s adjust the sensor sensitivity based on your specific needs, typically ranging from 20 to 70 feet of detection distance.
To fine-tune our setup, we’ll use the test mode feature. Walk in circles beneath the sensor while we adjust the settings to achieve the best motion detection without false triggers from small animals or environmental factors. Consider installing dual technology sensors for maximum accuracy and reduced false alarms. For best results, we recommend positioning the sensor heads strategically and testing different angles. Remember to take into account seasonal changes that might affect performance, such as falling leaves or snow, and adjust sensitivity accordingly. Monthly testing will guarantee consistent, reliable operation of your security lighting system.
Waterproofing and Weather Protection
When working with outdoor motion sensor lights, waterproofing becomes critical to guarantee long-term reliability and safety. Let’s make sure our installations withstand the elements using proven waterproofing techniques and weather protection methods. We’ll start by selecting fixtures with appropriate IP ratings for outdoor use, typically IP66 or higher, and mount them using corrosion-resistant brackets and hardware. Installing at 8 to 12 feet above ground provides optimal coverage while protecting from direct water exposure.
We’ll apply silicone caulk around the mounting plate and fixture seams to prevent moisture intrusion. It’s important to use weatherproof wire connectors and protect all electrical connections with proper sealing materials. For maximum protection, we’ll install the fixtures under eaves when possible and ascertain all components are rated for local temperature and humidity conditions. Remember to check that materials are UV-resistant to prevent degradation from sun exposure.
Testing and Fine-tuning Sensor Settings
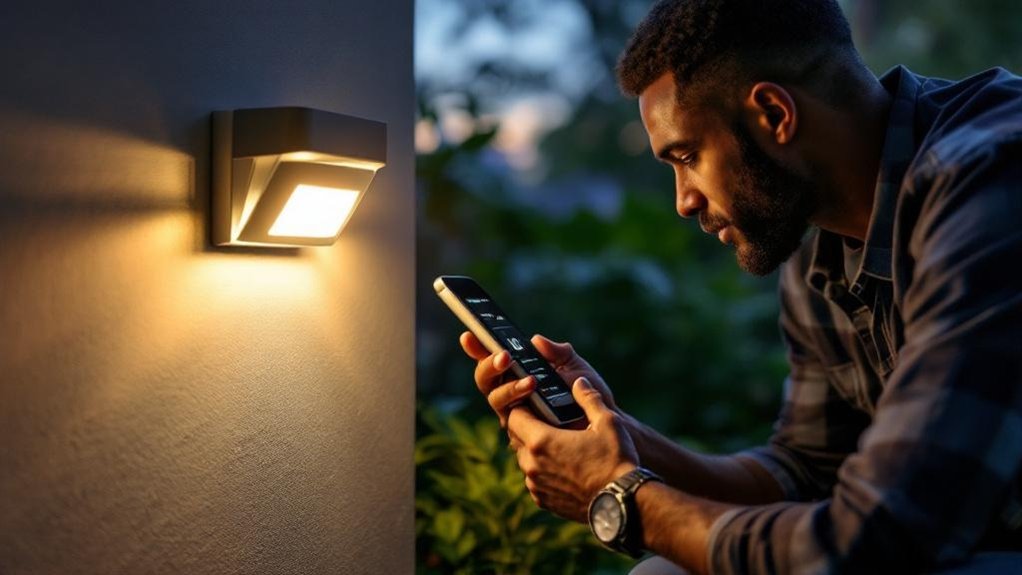
Testing motion sensor lights requires methodical calibration to achieve ideal performance and reliability. We’ll begin by activating the test mode, which allows us to make precise adjustments without automatic triggering. During sensor calibration, give the unit 30-60 seconds to stabilize its readings. For enhanced protection, consider integrating with performance and security solutions that safeguard against potential threats.
Next, we’ll focus on sensitivity adjustment by using the control dial on the sensor head. Let’s walk in widening circles around the detection zone to verify coverage while fine-tuning the settings. We want to minimize false triggers from leaves or animals while maintaining adequate security coverage. If you’re experiencing issues, we recommend cleaning the sensor lens and checking for physical obstructions. Don’t forget to adjust the duration settings to specify how long lights remain on after motion detection.
Frequently Asked Questions
Can I Install Motion Sensor Lights on Vinyl Siding?
Yes, we’ll help you achieve safe vinyl siding installation with motion sensors. We recommend using specialized mounting plates for proper compatibility, ensuring secure attachment while maintaining your siding’s integrity and weather resistance.
Will My Pets Trigger the Motion Sensor Lights?
We’ll help you adjust your sensor sensitivity to minimize pet triggers. Many modern motion sensors can be calibrated to ignore pet behavior under 85 pounds while maintaining security effectiveness.
How Long Do Motion Sensor Light Bulbs Typically Last?
We recommend LED motion sensor bulbs for their superior lifespan of 25,000-50,000 hours. With typical use, you’ll enjoy 10-20 years of reliable service from these energy-efficient, long-lasting security solutions.
Can Motion Sensors Detect Movement Through Windows or Glass?
We want you to know that most sensor technology can’t reliably detect through glass due to interference. Insulated windows block infrared energy, making traditional motion sensors ineffective through glass barriers.
Do Extreme Temperatures Affect Motion Sensor Performance?
We can confirm that temperature sensitivity affects motion sensor performance. Environmental factors like extreme heat or cold may decrease detection accuracy unless sensors include temperature-compensating circuitry for ideal functionality.
Conclusion
We’ve covered the essential steps for a proper motion sensor light installation that meets electrical codes and safety standards. While DIY installation is possible for basic setups, don’t hesitate to contact a licensed electrician for complex wiring or high-mounted fixtures. Remember to test your system thoroughly, verify all weatherproofing seals, and maintain regular checks of sensitivity settings to guarantee peak security coverage for your property.