To wire a smart thermostat properly, we’ll first turn off power at the circuit breaker and verify with a voltage tester. We’ll remove the old thermostat, carefully labeling each wire according to its terminal. The C-wire (usually blue or black) is essential for continuous power. We’ll connect each wire to its corresponding terminal on the new backplate, mount it level, and secure all connections before restoring power. Proper installation guarantees peak performance and prevents potential system damage.
Key Takeaways
- Turn off power at the circuit breaker and verify with a voltage tester before touching any wires.
- Identify wire terminals correctly – typically red (R) for power, white (W) for heat, yellow (Y) for cooling, green (G) for fan.
- Ensure a C-wire (common wire) is connected for continuous power to smart thermostats.
- Use wall anchors when mounting the thermostat backplate to prevent sagging and ensure proper leveling.
- Test all functions (heating, cooling, fan) after installation to verify proper wiring configuration and system communication.
Essential Tools and Preparation for Smart Thermostat Installation

The installation of a smart thermostat requires proper preparation and the right tools to guarantee safety and functionality. At Pride Electric, we emphasize proper tool selection, including a Phillips screwdriver, power drill with 3/16″ bits, needle-nose pliers, electrical tape, and twist-on connectors for secure wiring. A stud finder with wire sensing technology prevents accidental drilling into hidden wires. Taking a photo of wiring before disconnection is highly recommended as documentation for future reference.
Installation safety begins by turning off power at the circuit breaker and verifying with a voltage tester. Always check that your system uses 24 VAC, as higher voltages require professional assistance. We recommend photographing your existing wiring before disconnection for reference. Remember to label all wires clearly and inspect them for damage before connecting to your new smart thermostat.
Understanding Your Home’s HVAC Wiring System
Understanding your home’s HVAC wiring system represents a critical foundation for successful smart thermostat installation. Most systems incorporate both low voltage (24V) control circuits and line voltage power components. The control side uses color-coded wires that follow industry standards: red (R) for power, white (W) for heat, yellow (Y) for cooling, green (G) for fan operation, and blue/black (C) for common.
Before disconnecting anything, we recommend photographing your current wiring configuration. Wiring diagrams specific to your system can typically be found in your equipment manual or manufacturer’s website. These diagrams come in two formats: schematic (ladder) diagrams showing functional relationships, and pictorial diagrams illustrating physical connections. Understanding these distinctions helps guarantee you’ll properly connect your smart thermostat to components like transformers, relays, and contactors. Modern smart thermostats can help manage system efficiency by utilizing pressure switches to monitor refrigeration pressure and protect your HVAC components.
The Critical Role of the C-Wire in Smart Thermostats
We’ll now examine the C-wire’s fundamental role in providing continuous 24-volt power to smart thermostats, enabling their advanced functionality and connectivity. Most newer systems include this essential component for proper smart thermostat operation. If your home lacks a C-wire, various adapters or alternative power solutions can bridge this gap without requiring extensive rewiring. When troubleshooting smart thermostat installation problems, checking for proper C-wire connection at both the thermostat and HVAC control board terminals should be your first diagnostic step.
Power Supply Fundamentals
When installing a smart thermostat, proper power supply configuration stands as the foundation for reliable operation. The C-wire (common wire) is essential for maintaining consistent power to your smart thermostat, guaranteeing its Wi-Fi capabilities and advanced features function without interruption.
Unlike traditional thermostats, smart models require more power for energy efficiency features and continuous connectivity. While the C-wire doesn’t control heating or cooling directly, it provides the constant power flow these devices need. Typically blue or black, this wire connects to the C-terminal on your thermostat. Attempting to operate without adequate power may result in WiFi connectivity issues due to insufficient voltage.
We at Pride Electric understand that older homes may lack a C-wire, requiring alternative solutions like converting unused wires or installing adapters. Remember, proper power supply guarantees your smart thermostat delivers the comfort and efficiency you expect.
Adapters and Alternatives
The C-wire serves as the backbone of your smart thermostat’s power infrastructure. Without this connection, many devices struggle to maintain Wi-Fi connectivity and advanced functions.
If your system lacks a C-wire, several alternatives exist. Consider using an unused wire from your existing bundle, repurposing it as the common wire. Alternatively, install a C-wire adapter or power extender kit—these accessories create the necessary continuous power supply without extensive rewiring. The Sensi app can guide you through identifying and converting wires appropriately for your specific system setup.
Some smart thermostat models offer their own solutions, like the Nest Power Connector, which simulates C-wire functionality. For simpler setups, battery-powered options like select Sensi models can operate without a common wire, though they may have limited features.
Remember that proper power supply guarantees your smart thermostat performs reliably, maintaining all the connectivity and automation benefits you expect.
Installation Troubleshooting Tips
Why do so many smart thermostat installations fail? Most issues stem from incorrect C-wire implementation. When your thermostat loses power or displays erratic behavior, check your wire color coding first. Many homeowners misidentify wires, leading to dangerous connections and system failures.
Without a proper C-wire providing constant voltage, smart thermostats often experience intermittent connectivity or complete shutdown. Before installation, verify thermostat compatibility with your existing HVAC system—not all models work with all systems. If you discover there’s no C-wire, you might find an unused wire hidden that can be repurposed as your common wire.
If you encounter power issues, inspect connections for loose wires or incorrect terminals. Temperature reading discrepancies typically indicate faulty wiring or sensor placement.
Remember to always disconnect power at the breaker before troubleshooting any electrical connections. When in doubt, we recommend consulting us at Pride Electric to guarantee safety and proper functionality.
Step-by-Step Wiring Process for Maximum Safety
Properly wiring a smart thermostat requires meticulous attention to safety procedures and electrical standards to prevent shock hazards and equipment damage. Before beginning, we always switch off power to the HVAC system at the breaker panel to eliminate electrical shock risk.
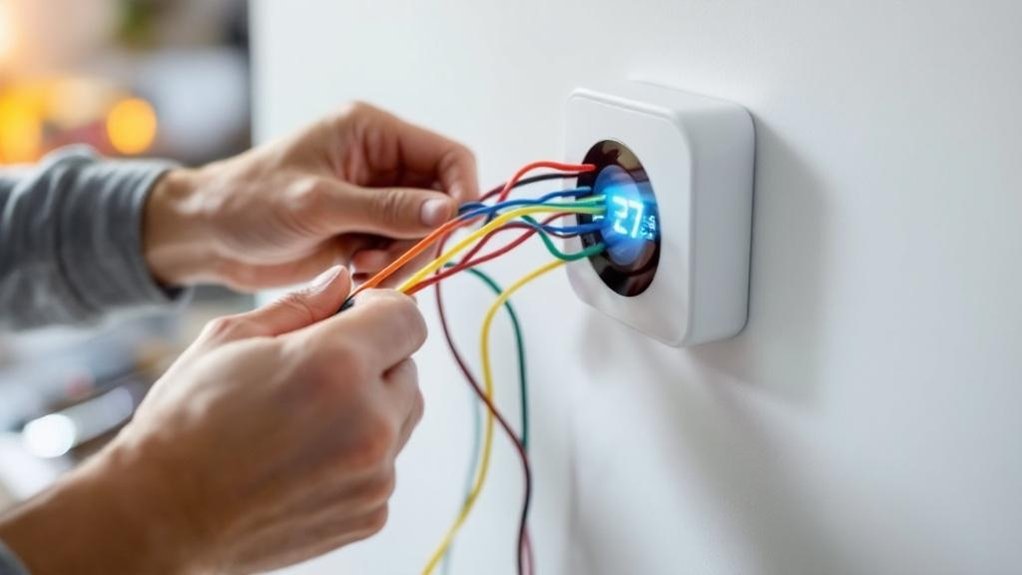
Wire labeling is critical—use the provided stickers to mark each wire according to its terminal designation (R, C, W, Y) before disconnecting from your old thermostat. We recommend taking a photo of the original configuration as backup.
Safety precautions must include verifying your system operates on 24 VAC, as smart thermostats aren’t compatible with high-voltage systems. Most importantly, ensure a C wire is available for powering your smart thermostat, as it provides the necessary continuous power for WiFi and display functions. When connecting wires to the new thermostat base, make certain each labeled wire is securely fastened in its corresponding terminal, with no exposed copper visible that could cause shorts.
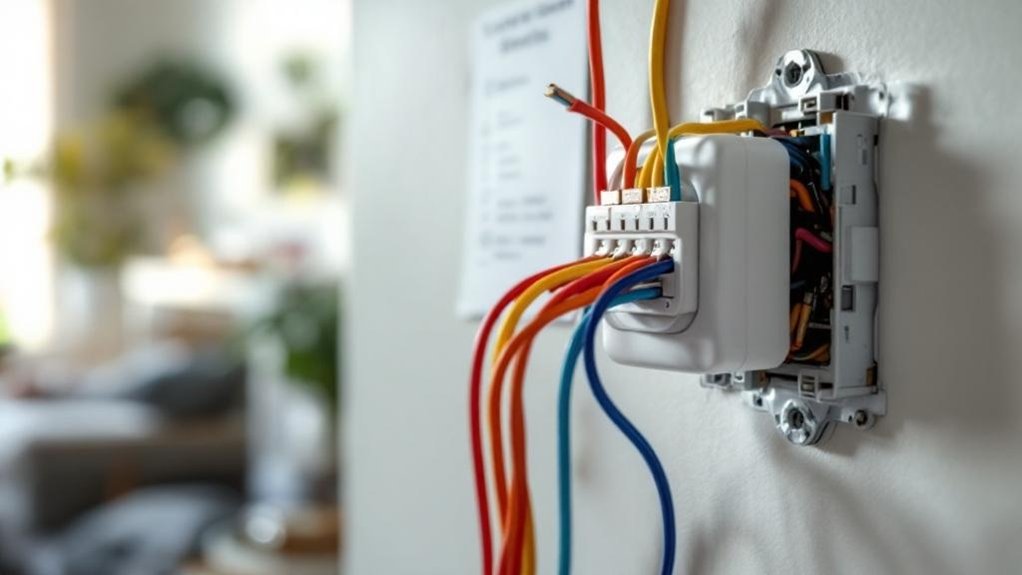
Mounting the Backplate and Securing Connections
We’ll now focus on properly mounting your thermostat backplate, where level positioning is essential for both aesthetics and functionality. Using appropriate wall anchors prevents future sagging that could compromise wire connections and thermostat performance. Managing excess wire by carefully tucking it into the wall cavity guarantees clean installation while preventing interference with the faceplate attachment. After securing the backplate, you’ll need to match the wire colors/labels to the correct terminals on your new smart thermostat.
Level Positioning Matters
Guaranteeing perfect level positioning of your smart thermostat backplate represents one of the most critical aspects of the installation process. We at Pride Electric cannot overemphasize how proper level adjustment techniques impact both functionality and aesthetic importance of your thermostat installation.
When your thermostat is perfectly level, it not only delivers a professional appearance that enhances your home’s interior but also assures peak performance. Many homeowners don’t realize that improper leveling can affect temperature calibration, potentially causing inaccurate readings and inefficient system operation. After securing the backplate, you’ll need to push excess wires back into the wall to ensure a clean fit against the wall surface.
A level installation also prevents unnecessary strain on mounting hardware, extending the lifespan of your device. Remember, even slight misalignment may compromise both the visual appeal and operational integrity of your smart thermostat—details that matter for both comfort and energy efficiency.
Wall Anchors Prevent Sagging
When installing your smart thermostat, wall anchors serve as the foundation for long-term stability and performance. We recommend using drywall anchors even in seemingly solid walls to prevent future sagging that could disrupt wiring connections.
For proper installation techniques, drill ¼” pilot holes after verifying no electrical wires lie behind. Tap anchors flush with the wall surface, then pull thermostat wires through the backplate’s center opening. Use a level for alignment to guarantee horizontal alignment before securing with at least two screws.
The wall anchor benefits extend beyond immediate stability—they prevent drywall damage and maintain consistent connections over time. After mounting, test each wire connection by gently tugging to verify they’re locked into terminals. This approach guarantees your smart thermostat remains securely positioned without shifting or loosening.
Excess Wire Management
Proper management of excess wiring directly impacts the performance and longevity of your smart thermostat installation. At Pride Electric, we carefully tuck excess wire back into the wall cavity after securing connections to prevent pinching or damage.
When organizing your wires, pull them gently through the backplate’s center hole and straighten ends to approximately 3/8 inch exposed. Avoid bunching excess wire under the backplate, which can prevent flush mounting and create strain on connections.
After wiring is complete, push extra wire length back into the wall carefully, avoiding sharp bends or kinks. Keep wires clear of mounting points to prevent accidental damage. For particularly challenging wire organization situations, small cable ties can help manage excess wire while maintaining sufficient clearance for the thermostat to sit properly against the wall.
Powering Up and Testing Your Wiring Configuration
After completing your thermostat wiring connections, it’s critical to power up and test the system properly to verify functionality. First, make sure your HVAC circuit breaker is switched off throughout the wiring process to prevent electrical hazards.
Once you’ve secured all wires to their proper terminals, return to your breaker panel and restore power. Your thermostat should immediately light up, indicating successful wiring verification. If the display remains blank, double-check your connections and make sure wires are firmly seated in their terminals. For specific system configurations, you may need to use a Power Extender Kit to provide adequate power to your thermostat.
Next, run through power diagnostics by testing basic functions. Navigate through the thermostat’s setup screens to confirm communication with your heating and cooling components. Look for any error codes that might indicate miswired connections. We recommend testing each HVAC function (heat, cool, fan) individually to make sure your wiring configuration is correct.
Troubleshooting Common Wiring Issues and Solutions
Even the most careful installation can sometimes result in thermostat wiring challenges that require troubleshooting. One of the most common wiring mistakes is failing to verify power at the breaker before diagnosing issues. Always confirm your HVAC system is powered on first.
Check for loose or poorly inserted wires in terminals, as these cause intermittent operation. Wire ends should be straight and fully seated. When encountering “unconfigured wire” errors, access your thermostat app to properly specify each connected wire’s function.
For persistent problems, use a multimeter to test continuity and voltage at terminals. Jumper wire tests can help isolate faulty connections—connect R to G to test fan operation, for instance. Remember that missing C-wire issues and incorrect wire placement (swapping W and Y) are frequently behind smart thermostat malfunctions. Inspecting and resetting GFCI outlets nearby can resolve power-related thermostat issues that appear to be wiring problems.
Frequently Asked Questions
Can I Install a Smart Thermostat With a Heat Pump System?
Yes, we can install smart thermostats with most heat pump systems. They require proper heat pump compatibility verification and specific installation tips like checking for C-wire and O/B terminal connections.
Will a Smart Thermostat Work With My High-Voltage Baseboard Heaters?
Standard smart thermostats won’t work with high-voltage baseboard heaters. You’ll need specialized models like Mysa or Grus EcoNet-BH designed specifically for line-voltage thermostat installation. We recommend checking compatibility before purchasing.
How Do Smart Thermostats Handle Dual-Fuel or Multi-Stage Systems?
We offer smart thermostats with dual fuel compatibility that efficiently manage changes between heat sources. Our installations include configuring multi-stage settings to optimize your system’s performance while maintaining compliance with electrical codes.
Can I Use a Smart Thermostat Without Wi-Fi Connectivity?
Yes, you can. While offline functionality limits advanced smart thermostat features, basic temperature control and pre-set schedules will continue operating. We recommend Wi-Fi for ideal performance and energy-saving benefits.
Are Smart Thermostats Compatible With Older Furnace Models?
Yes, many smart thermostats are compatible with older furnaces, but thermostat compatibility depends on your system’s wiring. We typically need to verify furnace requirements, especially C-wire availability, before installation can proceed safely.
Conclusion
We’ve outlined the precise steps required for correct smart thermostat installation. By following proper terminal identification, maintaining polarity, and ensuring the C-wire is correctly installed, you’ll avoid damaging your HVAC system. Remember, all connections must comply with local electrical codes. If you’re unsure about any aspect of the wiring process, we recommend consulting a licensed electrician to prevent system failures and maintain warranty coverage.